


How to set up custom events in Google Analytics 4 (GA4)
We are now looking into Google Analytics 4 (GA4) and focusing on setting up custom events. Today, we will focus on custom events, which are an important part of analytics in GA4. The importance is not just about meeting technical needs, but also about using data to create an innovative digital presence.
Why It Matters:
Custom events in GA4 serve as the catalyst for personalized, data-informed decision-making. Picture tailoring your analytics to precisely monitor elements crucial to your business. In this guide, we explain the process and give insights that go beyond the basics. Why should you configure custom events? You can study how users use your website, make plans, and find useful information. These actions will help your digital projects succeed.
Tip: Curious about What are GA4 events and how they work? Dive into our blog post: Google Analytics 4 (GA4) Events: Comprehensive Guide to Custom Events.
How to create custom events in the GA4 interface:
The GA4 event panel lets us make custom events without using Google Tag Manager. We'll explain GTM later, GA4 panel blends events that have already been tracked.
Tip: This option is convenient if you don't want to deal with technical details, but it's also somewhat limited.
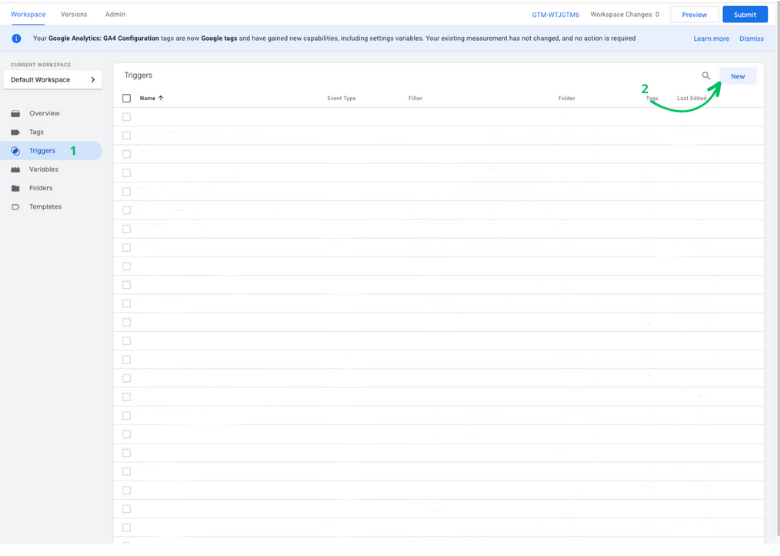
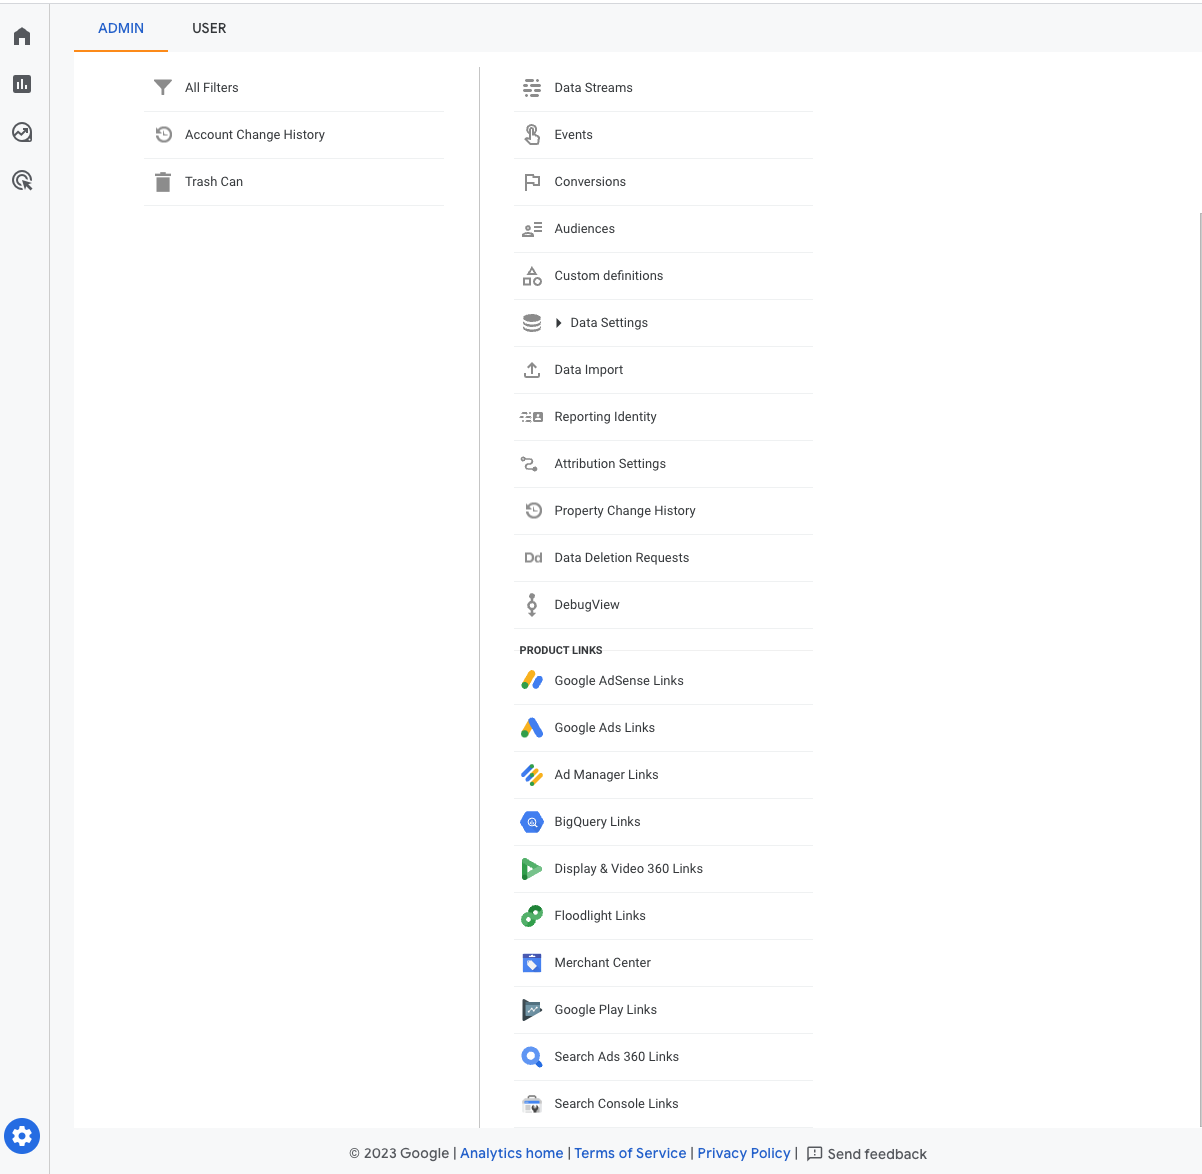
To create a new event:
- Go to Admin
- Click on Events
- Click on Create an event button
You will see the event panel, here you can tweak existing events settings and come up with new custom events.
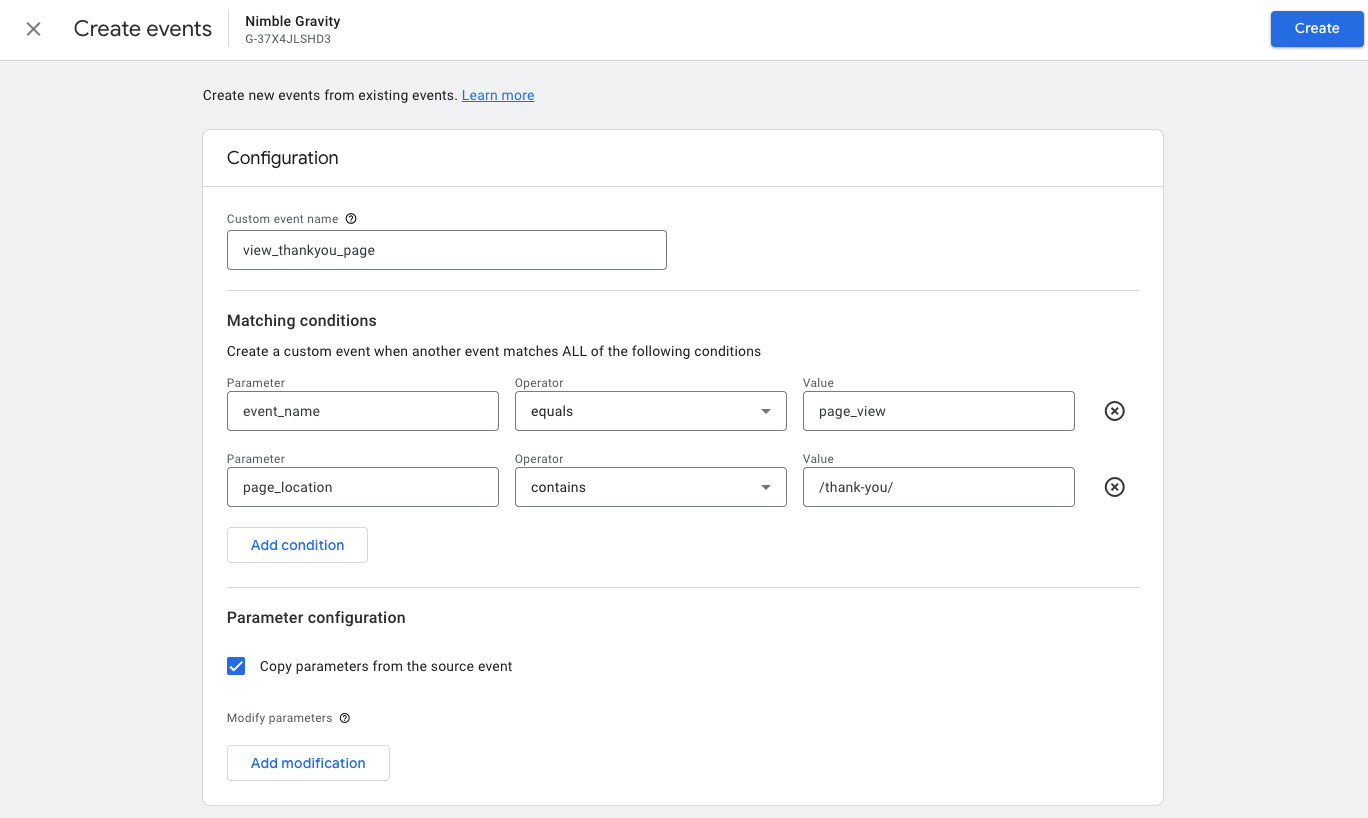
For instance, by combining the 'page_view' and 'page_location' events, you will have a brand new 'view_thankyou-page' custom event.

Let's create our 'view_thankyou_page' event.
- First, we need to define a new name for our custom event
- I will use view_thankyou_page
- Then, we will set our custom event conditions:
parameter
operator
value
event_name
equals
page_view
page_location
contains
/thank-you/
Now we save it and GA4 will track a new view_thankyou_page event when all conditions match
- When a page_view event fires on a page containing /thank-you/ on their URL.
By default, GA4 allows up to 50 custom event rules in a single property, so keep that in mind.
How to set up a Custom Event on GA4 using Google Tag Manager:
GTM (Google Tag Manager) is one of my favorite options for setting up custom events.
Its biggest benefit is the flexibility and convenience of having all our settings in one place.
Keep in mind that the next examples may not work on your website because your settings will be different. But you should have no trouble replicating them in your event strategy.
Let’s say we need to track all the links we have in our menu bar, and we need to fire a custom event for all link choices.

Start the GTM preview mode to see the changes our website makes when I click on buttons or links.
- Go to Google Tag Manager
- Click on preview mode button
- Paste your website URL
- Click connect
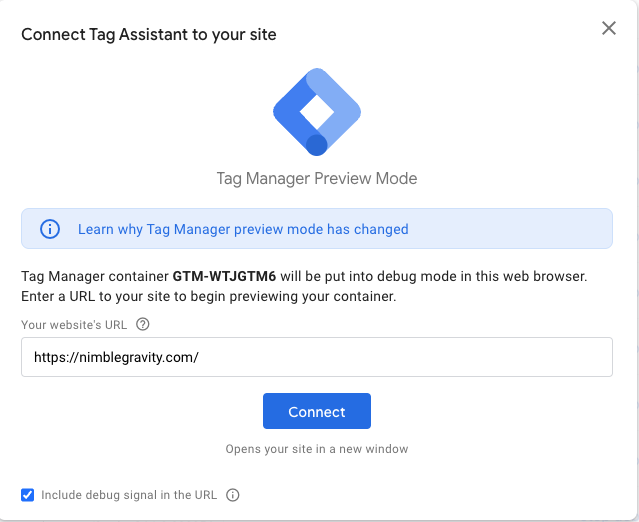
Wondering how to test if the preview mode is working? Look out for the ?gtm_debug=xxxxx parameter added to all the URLs on your website.
Now I can start debugging my site. Once I click on my menu bar GTM captures two events when I click on the “What we do” link
- Link click
- Button click
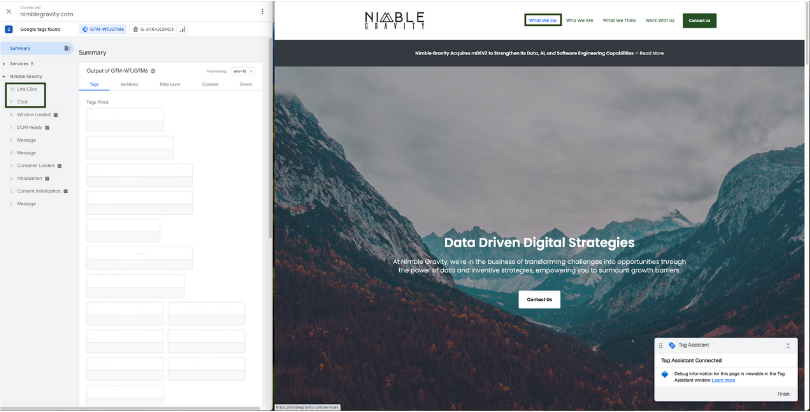
I tested my other menu links on our nimble gravity website. It always sends two events: a click button and a link button.
- Who We Are
- What We Think
- Work With Us
This happens because of the HubSpot template we use. I looked at the two events to see if they both send the same click class parameter and value header__menu-link, and they do.
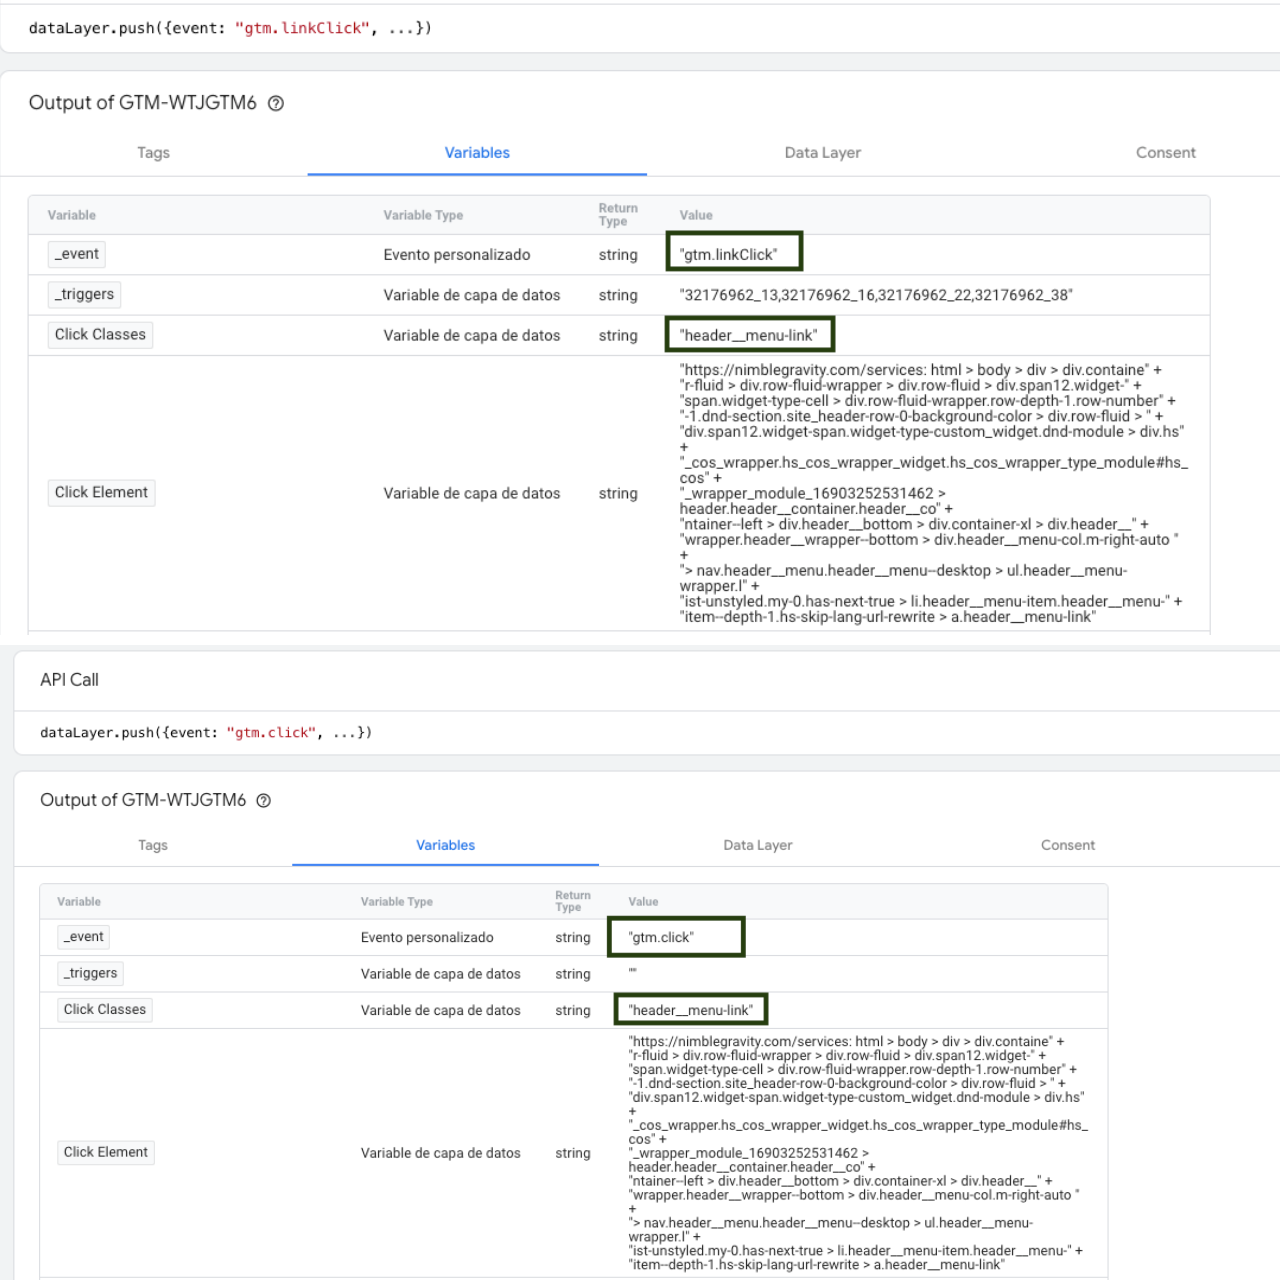
I can create an event to track my menu bar buttons. This event can be triggered by clicking the button or the link. Both the button and the link have the same class name so, for consistency, if the element is a link, the trigger will fire when the link is clicked.
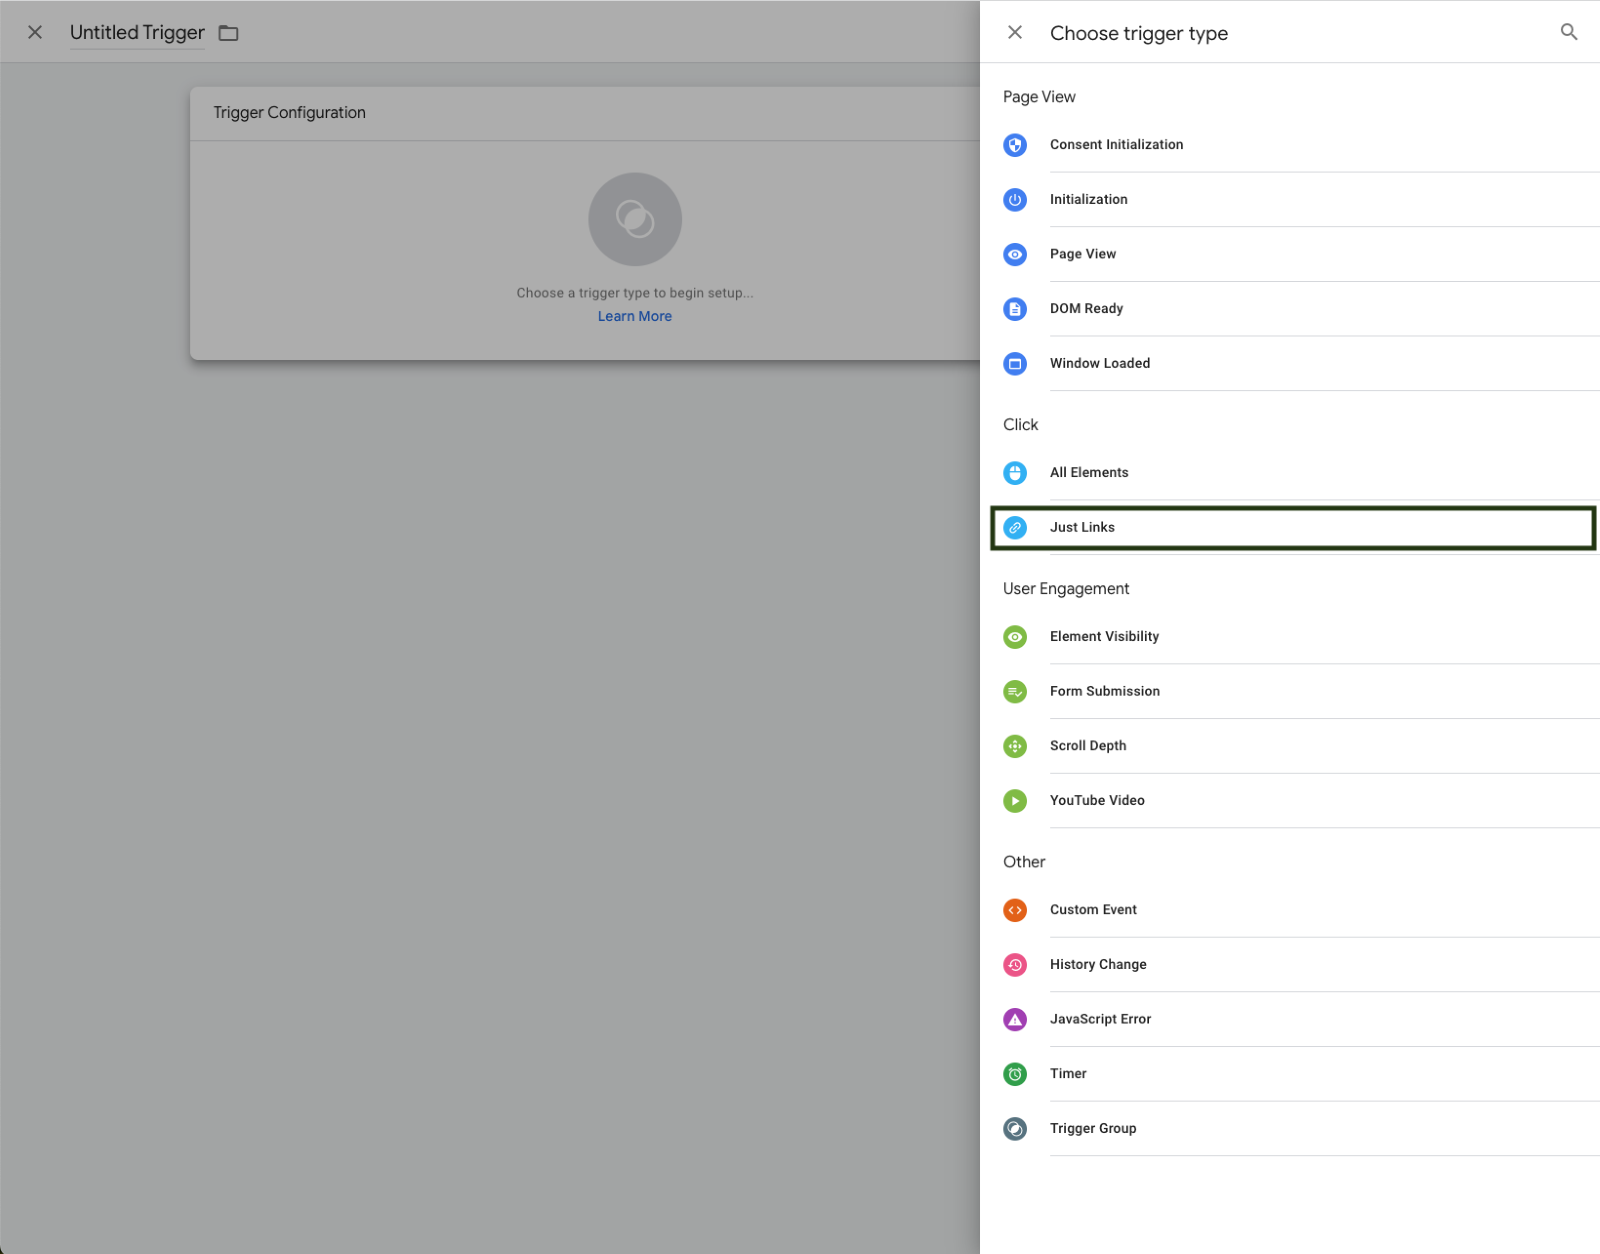
Select the trigger type: link click.
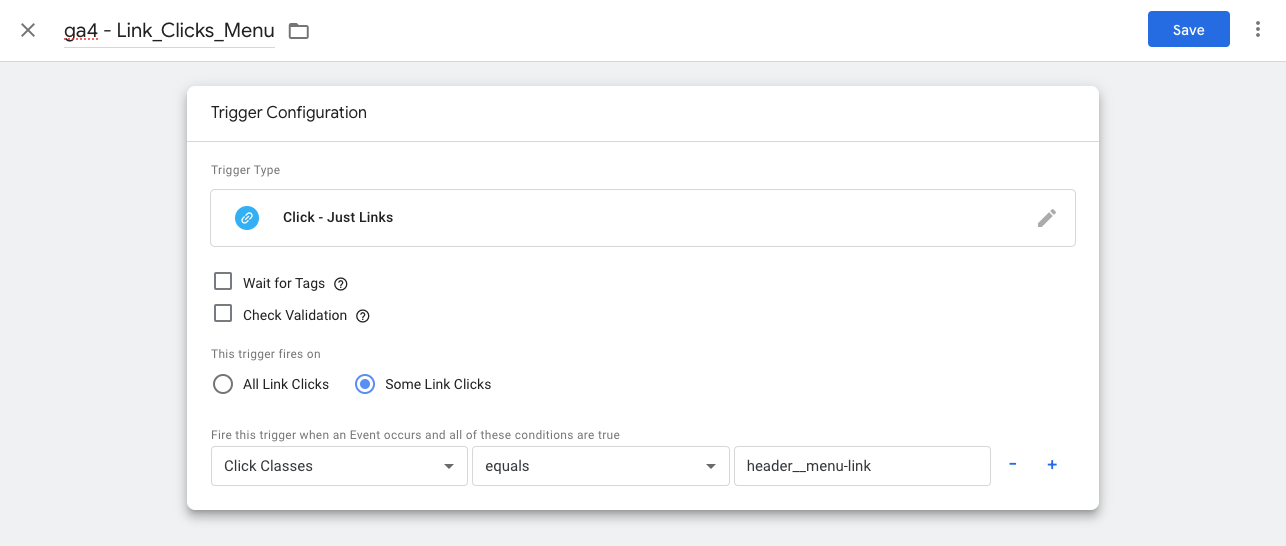
Then, we can configure our parameters:
- Click Classes will confirm the HTML of the element we are clicking.
- Equals is the comparison method
- header__menu-link is the value we are trying to review.
Now our trigger will fire if all our conditions are true.
Tip: Use a specific and detailed naming convention to find triggers easily and reuse them, when possible, to avoid creating unnecessary ones.
There are many alternative triggers; be sure to use the one that best suits your measurement strategy.
It's also crucial to understand the trigger parameters. Always think about how much maintenance the trigger will need after it's created so you can create the best trigger rules.
- Example: If you used a click text trigger, it would evaluate the link or button's text. It might work, but if the site keeps changing, it will likely break often in the future.
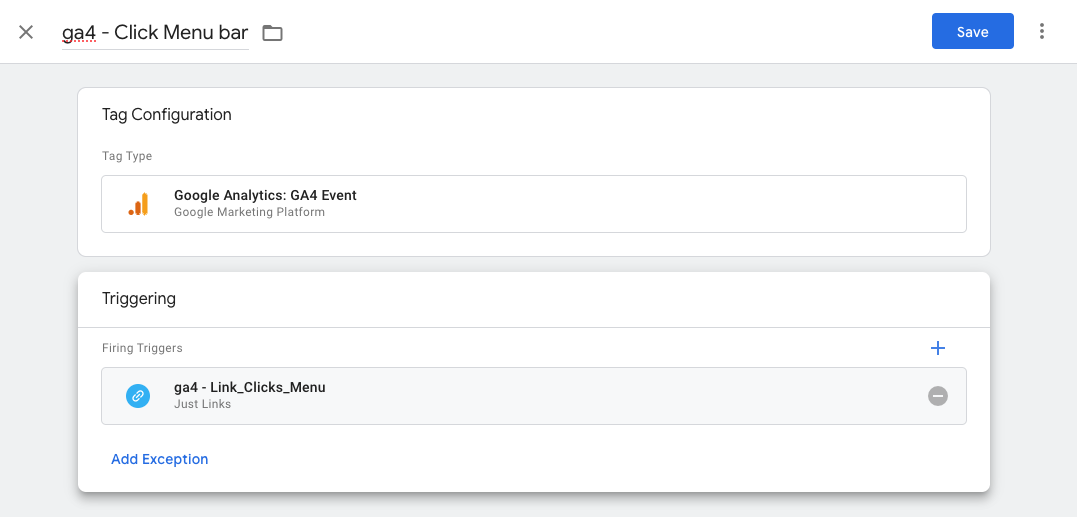
Configure custom event parameters in Google Tag Manager and send data to GA4
Go to Tags > New > Google Analytics > Google Analytics: GA4 Event
Remember to save the name of the tag with your naming conventions.
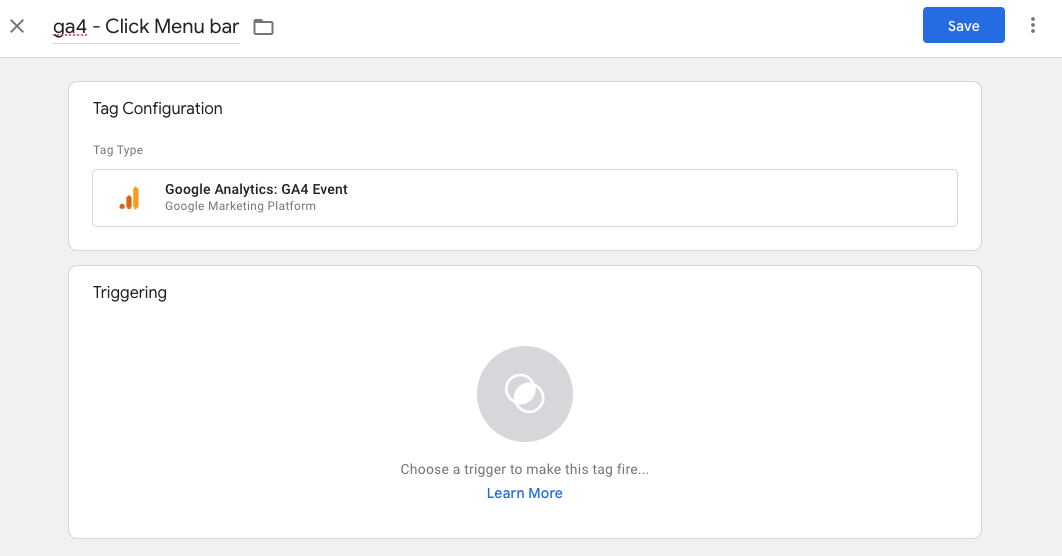
Now, I set my earlier trigger for this custom event.
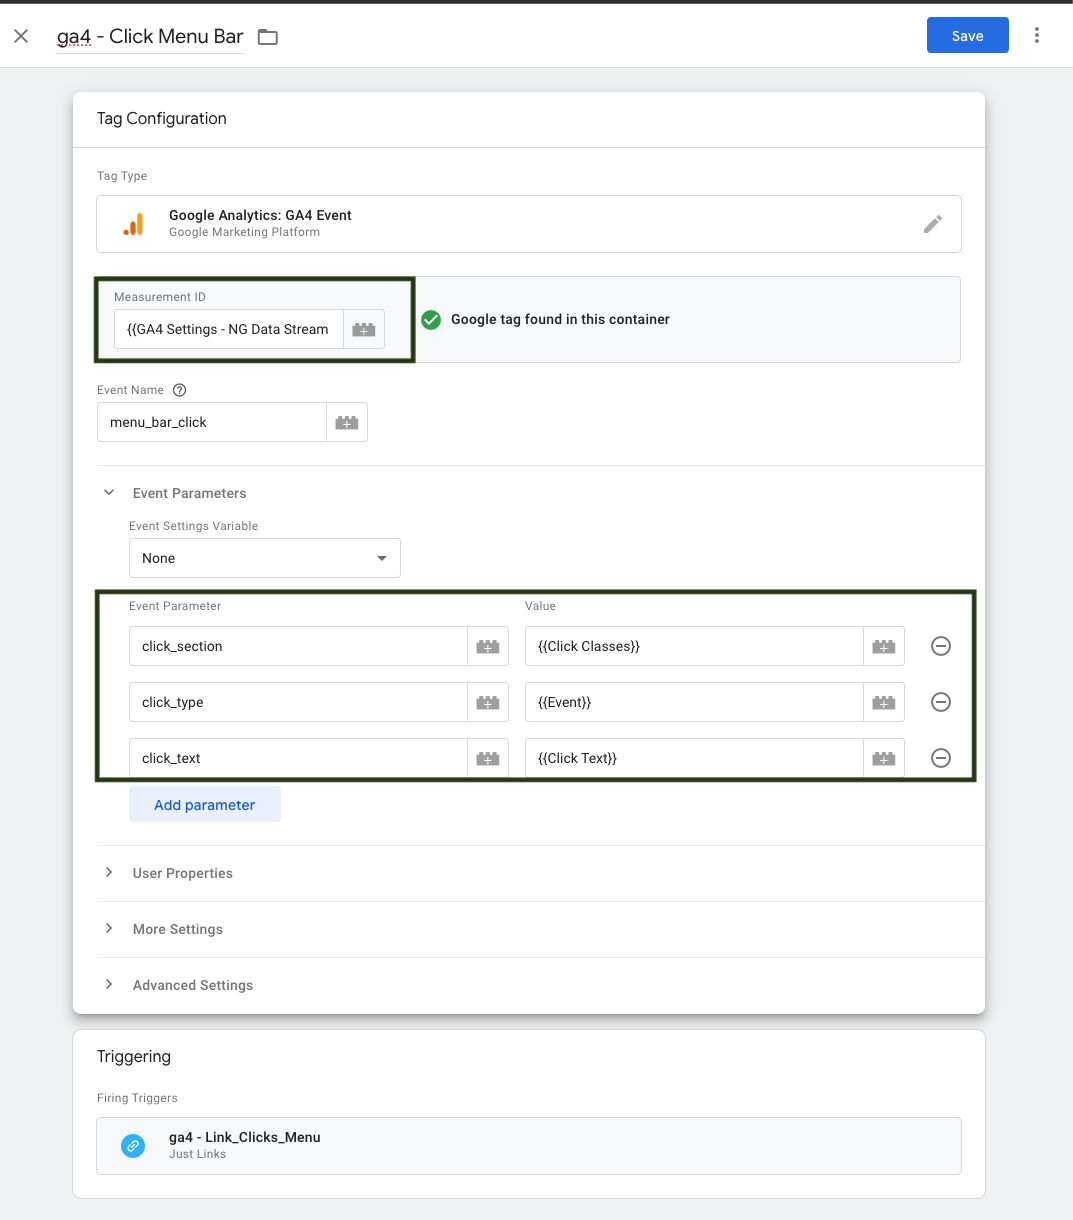
We specify the measurement ID of our data stream, I have it stored in a constant variable for convenience.
Then we define the name of our custom event and in this case, I make sure it is as descriptive as possible to the action that is being performed.
- menu_bar_click
To add parameters to the event, simply choose any name you prefer. Follow GA4's naming convention for consistency.
The parameters help us to send extra context to our custom event, make sure to align this to your measurement strategy.
In my case, what I want to send I want to know about this event
- Where it is being held
- Click class
- The type of event is
- A link
- The text that was clicked on
- Menu options text
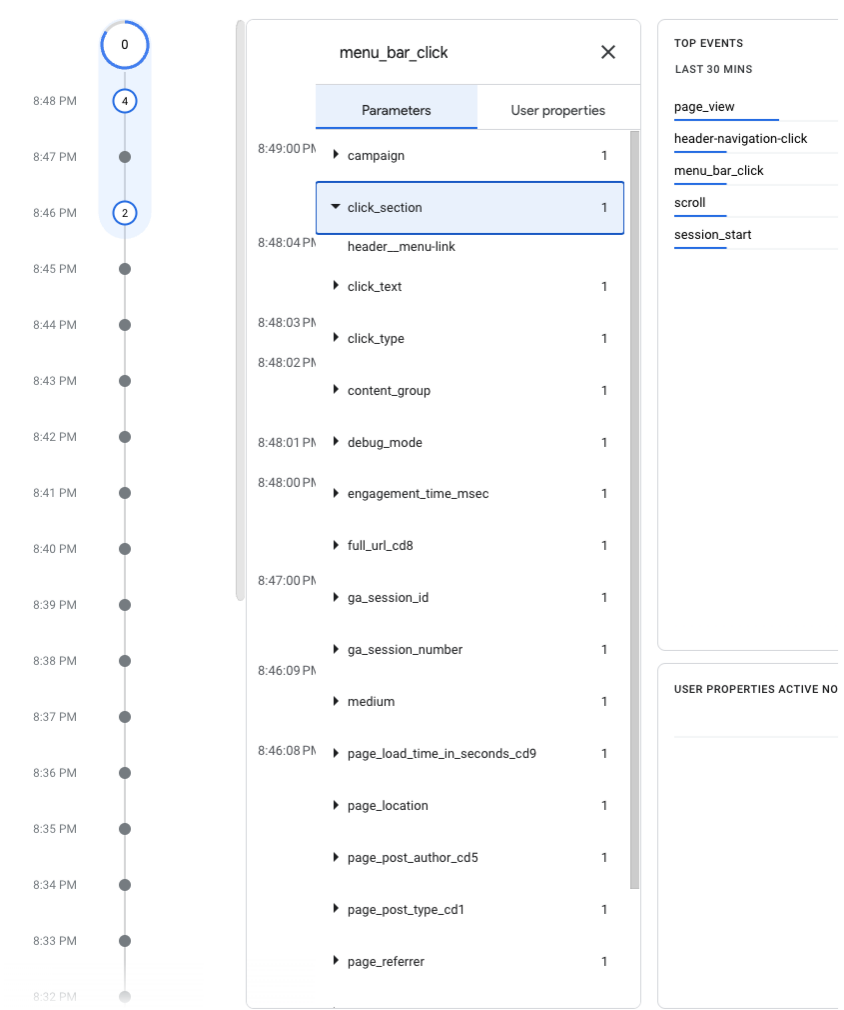
How to test your custom events in Google Analytics 4
After saving our event in GTM, we'll click preview mode to update and confirm everything is working. We can use the debugging view in GA4.
This view allows us to test the event before sending it directly to GA4, seeing it as a staging environment.
Once you see your event on the view click to see all the parameters.

Now, we just need to check if the parameters we send have the right values. We can test each link in our menu bar to make sure there aren't any empty values.
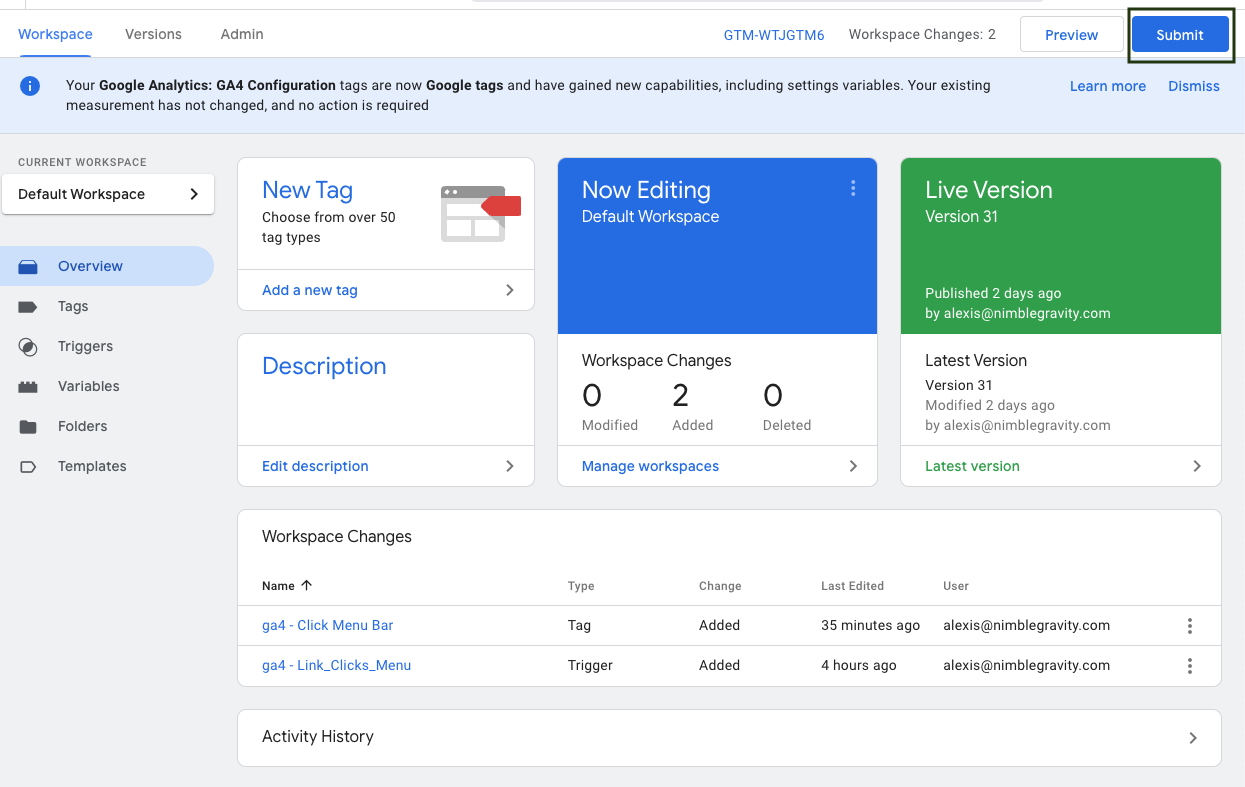
Once our QA process is complete, we need to return to Google Tag Manager. Then, we click the submit button to send our changes to the container. After that, our events will automatically appear in the GA4 property once it is published.
Conclusion:
Remember, whether you opt for GA4's simplicity or GTM's flexibility, strategic event creation is key. Consistency in trigger naming and parameter configuration ensures seamless tracking.
- Versatility in GA4: Explored the spectrum of event types, from automatic to custom, unlocking diverse insights.
- GA4 Interface Ease: Created custom events directly in GA4, a user-friendly approach for quick setups.
- GTM Flexibility: Leveraged Google Tag Manager for enhanced flexibility, especially in complex tracking scenarios.
- Testing Prowess: Rigorously tested events in GA4's debugging view via GTM, ensuring precision before deployment.
- In your GA4 journey, striking the right balance between simplicity and power is crucial.
We specialize in optimizing GA4 setups for companies. Let us guide you. Test, iterate, and uncover meaningful analytics with our tailored services. Elevate your digital success—partner with us today.
Elevate Your Digital Game with Nimble Gravity:
Ready to supercharge your digital success? Let Nimble Gravity fine-tune your strategy. Partner with us today for a seamless data-driven transformation. 🚀
Case in Point: Transforming Tribute with Nimble Gravity
Meet Tribute Technology, powering 15k+ websites for memorable end-of-life celebrations. Challenges in UX, pricing, and assortment were hindering flower store success. Nimble Gravity introduced an A/B testing framework, fixed Google Analytics reporting, and revamped the shopping experience. Result? A remarkable 50% sales boost in just 6 weeks.
Unlock Your Success: Boost Your Sales with A/B Testing and Our Framework for Growth with Tailored Analytics Services.
Explore the Tribute Technology case study here. 🌟